3D Printer Projects around the PEG Office
Like probably most people, throughout my life my hobbies have changed several times. However, one thing has remained a constant. Whether it was one of my first interests, paintball, or cars, or computers, there’s a common thread: parts. In all these hobbies, I’ve always found myself looking at all the upgrades and customizations that companies have to offer. So, when I first saw a video about 3D printing, I was interested for a few reasons. But unlike other hobbies, it wasn’t because of the parts I could buy to put on the printers. Rather, it was the ideas that I could make parts. In the world of video production, we had a lot of components on a shoot. Oftentimes these are low-volume, highly specialized parts. It’s not unusual to spend $250 for a viewfinder cable or $300 for an adapter that exists to connect one part from a manufacturer to another. Naturally, when you buy these parts, you’re also stuck with “what you get”. If you don’t like how that RED microphone mount works, too bad, because unless you have an $50,000+ injection molding machine and the source files, you’re not getting a V2.
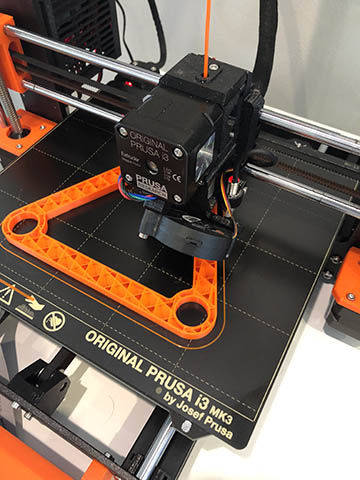
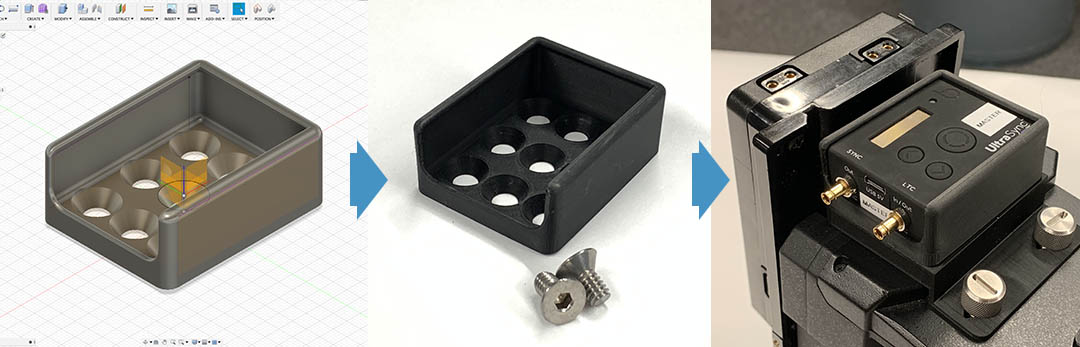
This is why when I saw how 3D printing works, it caught my eye. The basics of FFF (the most common type) 3D printing are simple. First you get some filament, which is essentially a continuous long strand of raw plastic, and you get it on a spool. Then you feed it into a part that essentially grips the strands and pushes it into a hot nozzle, where it melts. You put that nozzle on a moving carriage, and give it the ability to move left/right and forward/back, and you have 2D printing. Take that whole assembly and allow it to “climb” as well, and suddenly you have a 3D mechanism. You then find a 3D model, and run it through software that cuts the model into separate layers, and figures out what moves the printer needs to do to successfully make the part. You “slice” it, and give those commands to the printer, where it uses those to execute the print. Layer by layer the printer pulls in filament, moves around the printer bed, and at the end you have completed 3D print. You can approach 3D printing in a few ways. You can certainly use a 3D printer and not know how to 3D model. To do that you simply find pre-built models online, download them, and take them right to the slicer software. However, if you’re like me, that gets boring quickly and ultimately doesn’t help the end goal of not just using the printer as a toy, but rather as a tool. So my next goal was learning CAD, which is a type of industrial software that allows you to make one or multiple 3D models and parts. Nearly everything we use is made in CAD now-a-days, and learning it has allowed me to really open up my ability to put the machines to work for prototyping and eventually final manufacturing of parts for the PEG office. So what have we made? So far I’ve primarily used it to “fill in the gaps” of items at work where there just literally no one making the part we needed. For instance, we purchased some small devices that allow us to sync timecode between cameras, audio recorders, and other production equipment while filming. You would imagine that these devices would attach to our cameras with a screw, or maybe a bracket they’d slide into. But they don’t, and instead the manufacturer simply suggests we stick them on with double sided tape. Well that simply won’t do, so I designed a case that you first attach to the camera and then you simply slide the devices into that, which holds it securely in place. Much more elegant, and no replacing tape every shoot.
So what’s next in our custom fabricating plans? In my opinion, it’ll be evolving from “filling in the gaps” to “let’s make something from scratch.” First on my list, a fully wireless dolly system that I have some big plans for when it comes to stage-follows at live events. Keep an eye out, I’ve got the prototype in my head.